Integrate Netcore Email API with Ongage
Ongage is a vendor-agnostic email marketing platform wherein you can use one dashboard for all operations and finally send emails using your favorite ESP/SMTP provider.
The purpose of this document is to help you with the steps of integrating Netcore Email API as an SMTP/email delivery channel on Ongage.
Video Tutorial
1. Enabling the Private SMTP feature
In order to use Netcore Email API as an ESP/SMTP vendor on Ongage, you must have Private SMTP feature enabled on your account. By default this is disabled and you need to contact Ongage Support to enable the same.
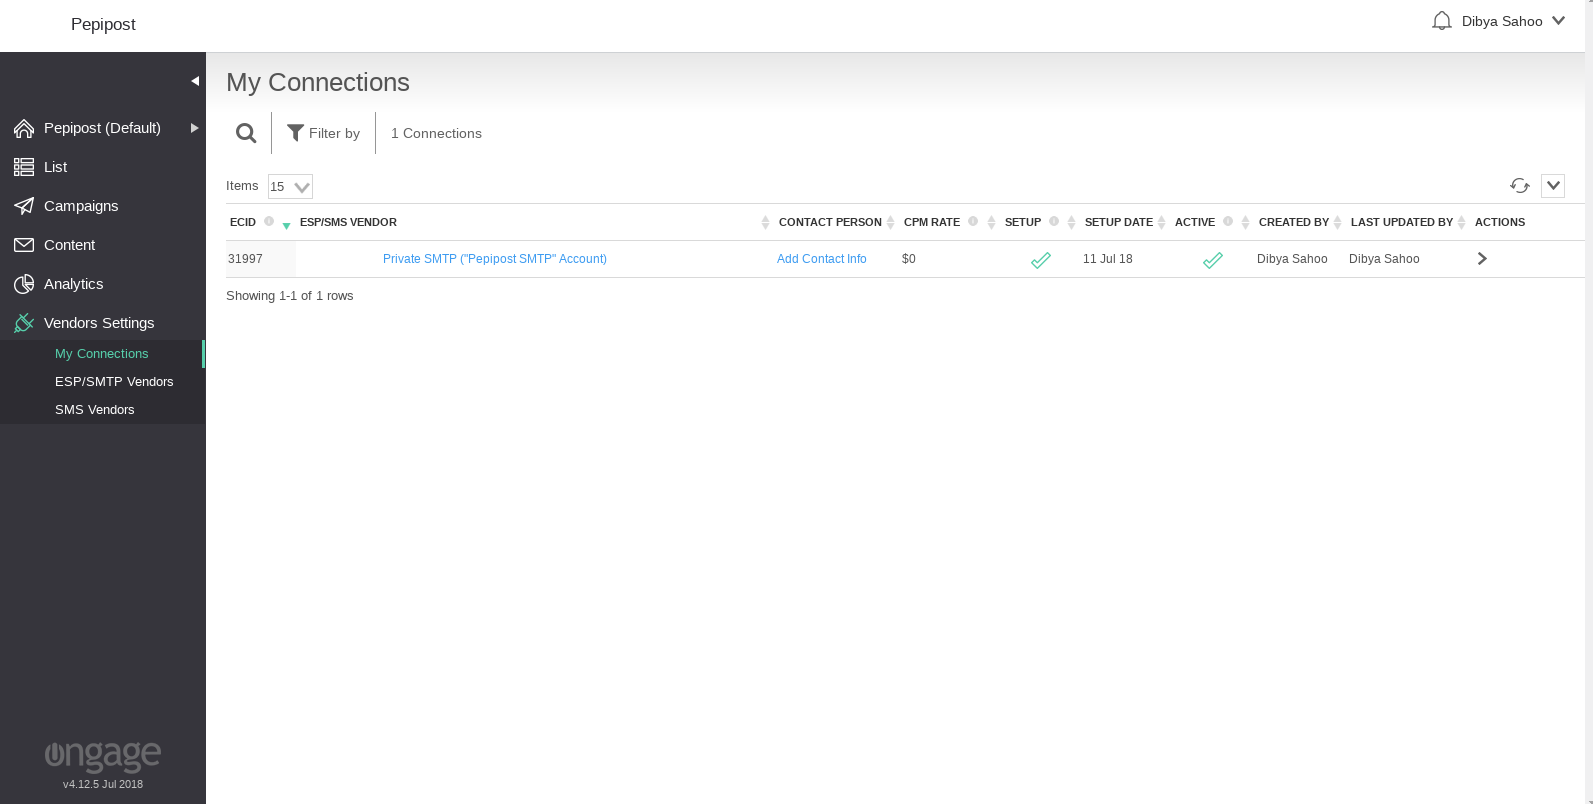
Once this feature is enabled you will see a Private SMTP option under Vendor Settings --> My Connections. Click on EDIT under Actions to configure Pepipost as your Private SMTP on Ongage.
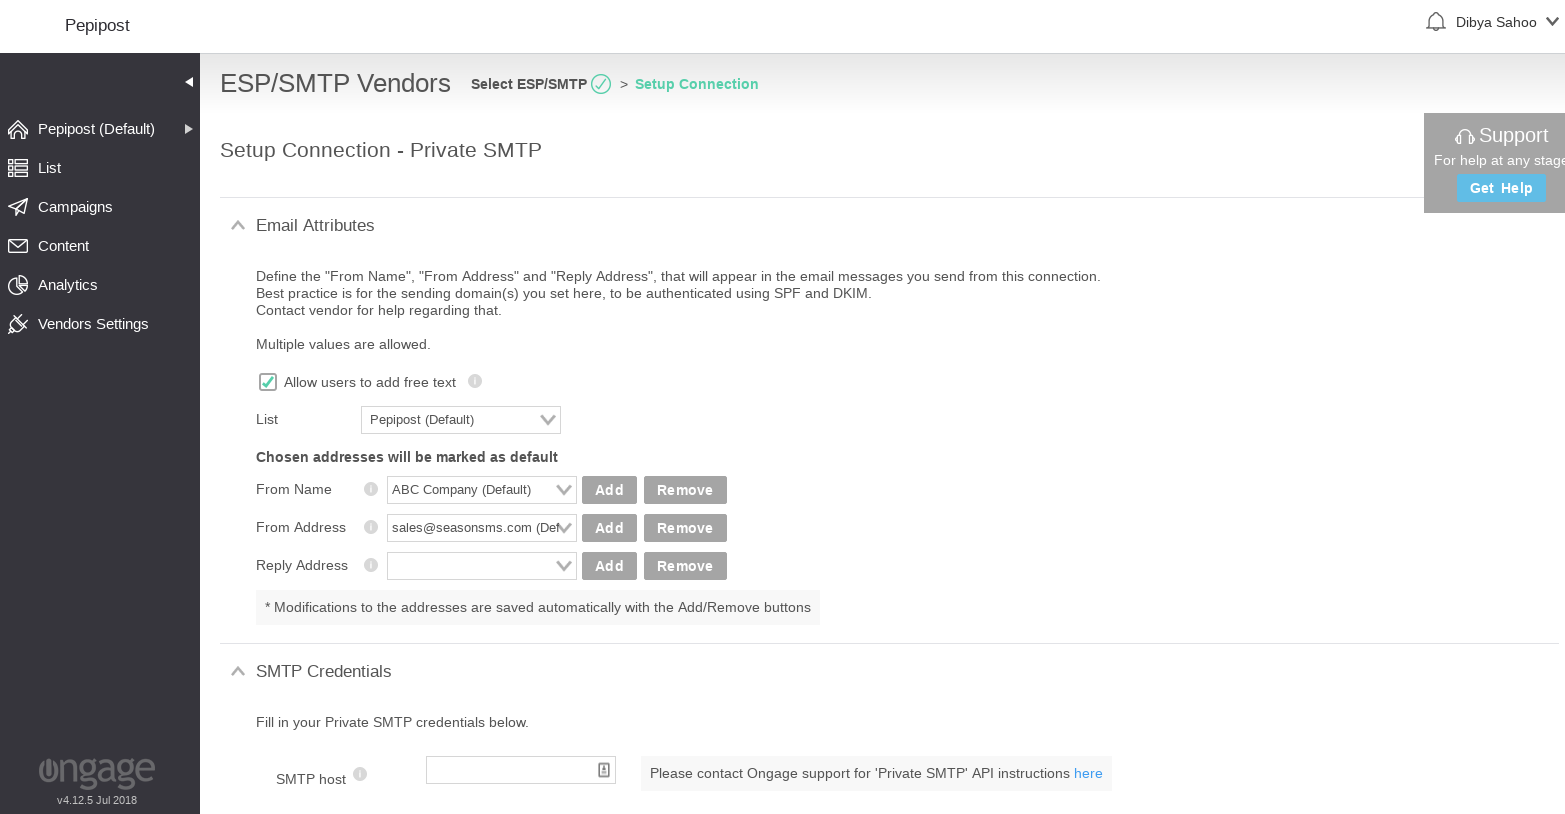
On the click on ESP SETUP, you will see a Private SMTP Setup page like the one above.
2. Configuring the Private SMTP
Email Attributes
The next step is to define the sender details under "Email Attributes" section.
-
From Name: This name will be used as the name that the email will come from. e.g. you can mention here; Your Company Name
-
From Address: This address will be used as the sending address. e.g. you can mention here; [email protected].
-
*Reply Address:** Reply from contacts will be sent to this address.
SMTP Credentials
- SMTP host: Enter your Netcore Email API SMTP hostname. e.g. smtp.netcore.net
- SMTP Port: You can connect via unencrypted or TLS on ports 25, 2525, and 587.
- SMTP Username: Enter your Netcore Email API Username
- SMTP password: Enter your Netcore Email API Password
- Authentication type: Select "Login"
- Use TLS: Select "Yes". If you are selecting this as Yes, then it is recommended to select port 587 above.
Once done, click on "Verify Credentials". During this phase, Ongage will try to make a connection to Netcore Email API SMTP using the details you mentioned. If the connection gets successful, you will see a success message else error.
Bounce Domain Setup
This domain will be used to process the bounces. Choose a domain like. bounce.mydomain.com
and point the MX of this sub-domain as follows:
bounce.mydomain.com MX 15 mxprocessorvs.ongage.net
Note
The Bounce domain i.e. bounce.mydomain.com needs to be pre-configured under the "Sending Domain" section on Netcore Email API using the SPF/DKIM mode of DNS verification (CNAME based verification mode is not supported for Ongage integration), click here to see the steps for pre-configuring a domain. If the domain is not configured and approved on Netcore Email API, then the email sending will fail under your Ongage account.
Once the MX pointing is done on your DNS. Click on the "SAVE" button at the bottom of the page.
Now, you are all done to send any type of test or live email campaigns from your Ongage account.
4. Sending your first email campaign
- Go to Campaigns --> Campaign Overview and click on "New Email Campaign" button
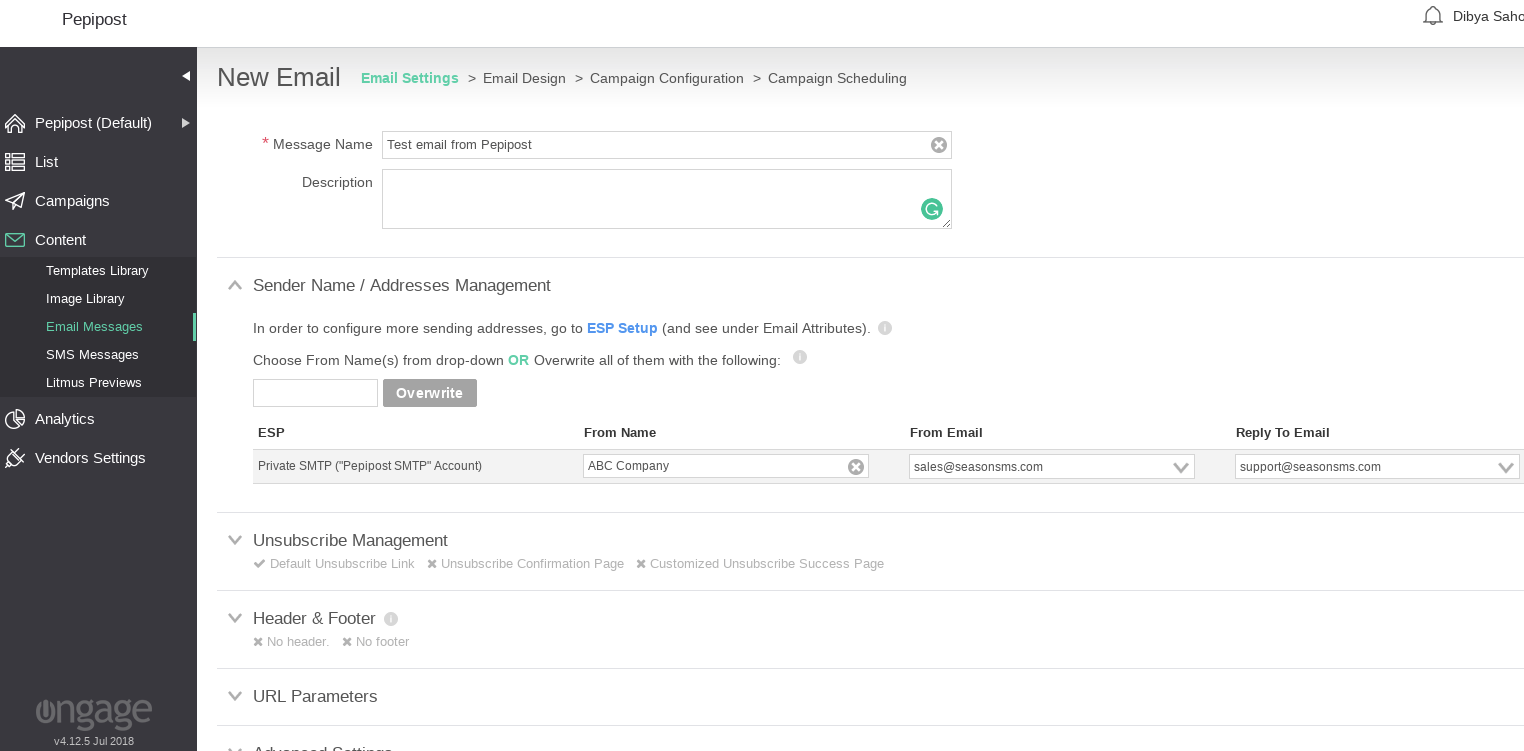
Select the ESP as "Private SMTP"
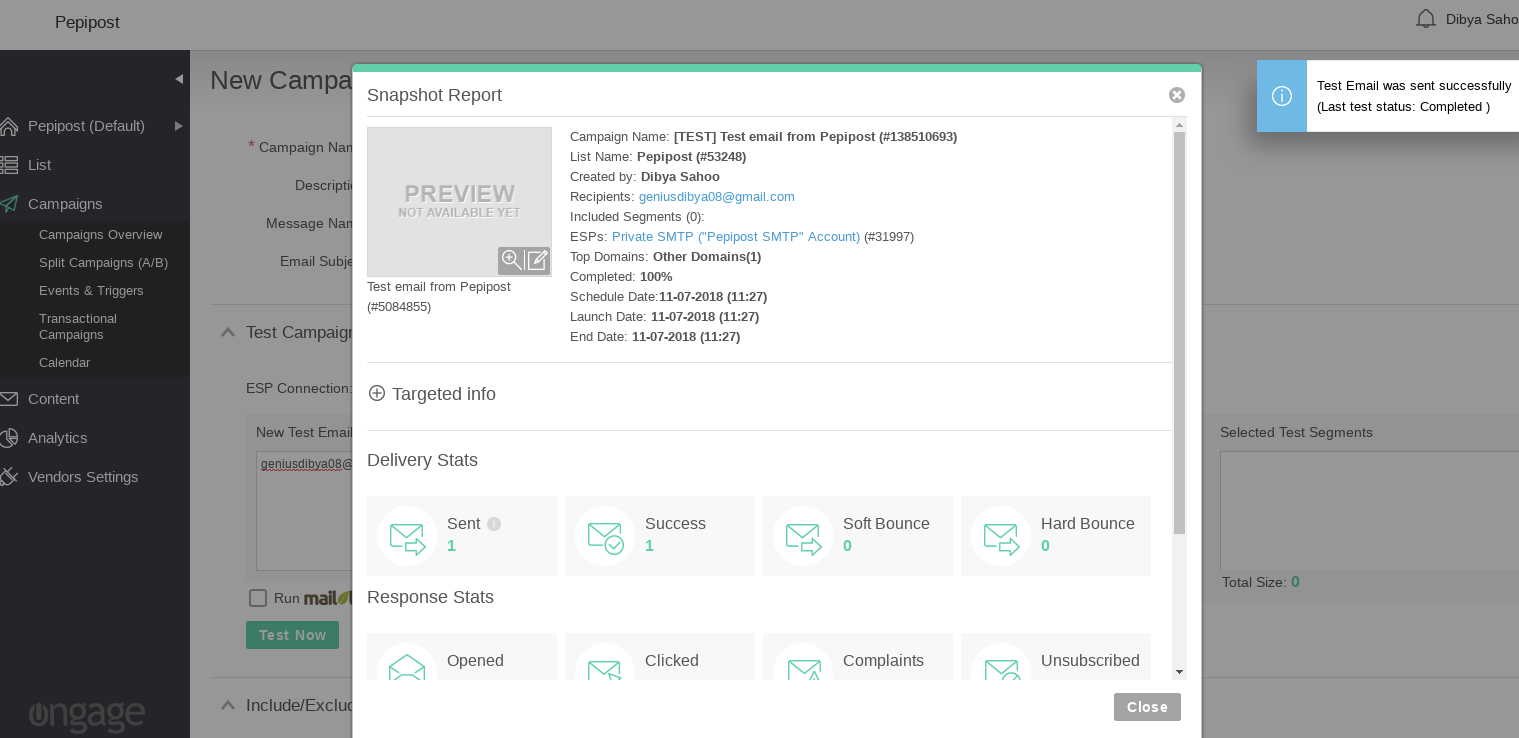
Entire the campaign details and mention your email address under the "New Test Email" box to send a test email.
5. Enabling the Open and Click Tracking
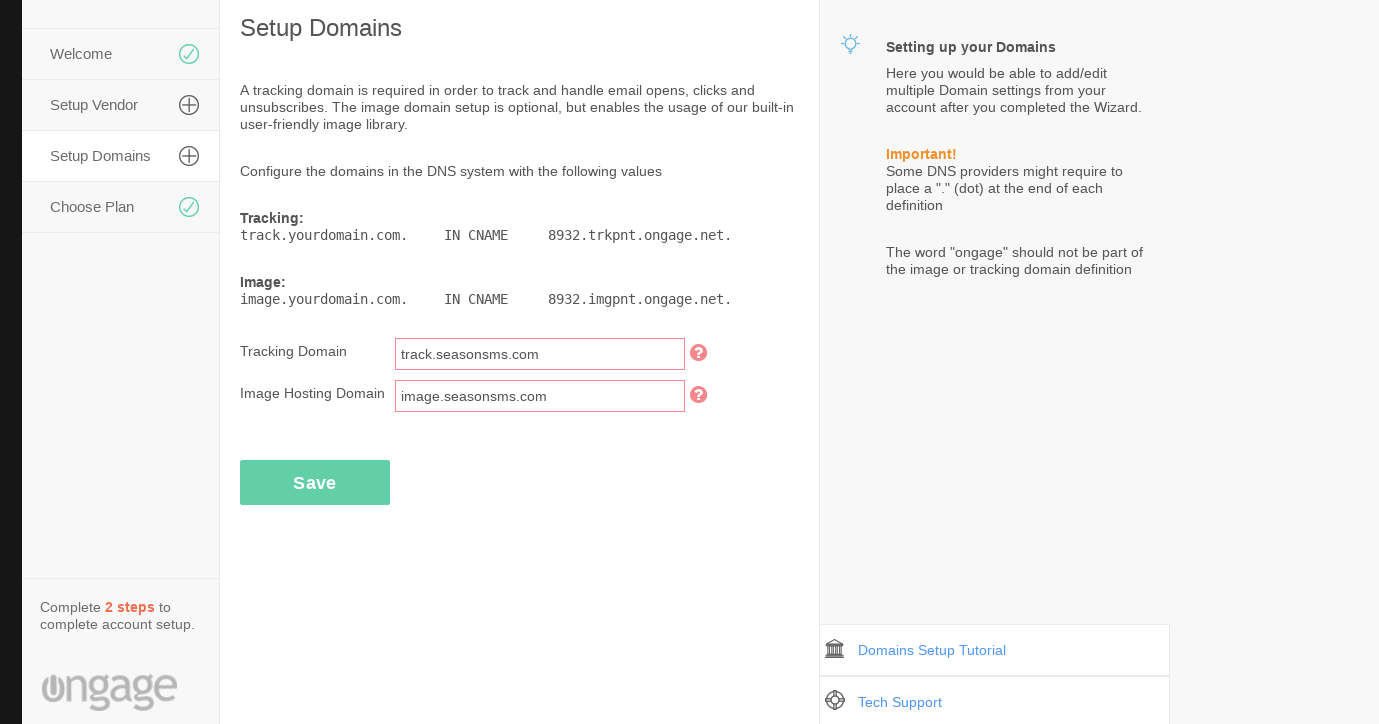
In order to enable and white label the open and click tracking domain for your emails, please ensure you have done the domain settings. For setting up the domain, please follow the Getting Started screen on Ongage and choose the option "Setup Domain".
Alternatively, hover over "Your Name" at the top right corner and click on the "Tracking and Image Domains". You need to do two CNAME records pointing for setting up the Tracking and Image sub-domains respective
Hope this document is helpful in doing the Ongage-Netcore Email API integration. In case you still have any query, please feel free to reach out on our 24x7 live chat support or write to us on [email protected]
Updated almost 5 years ago
