Suppressions
View and manage your suppression list.
Overview
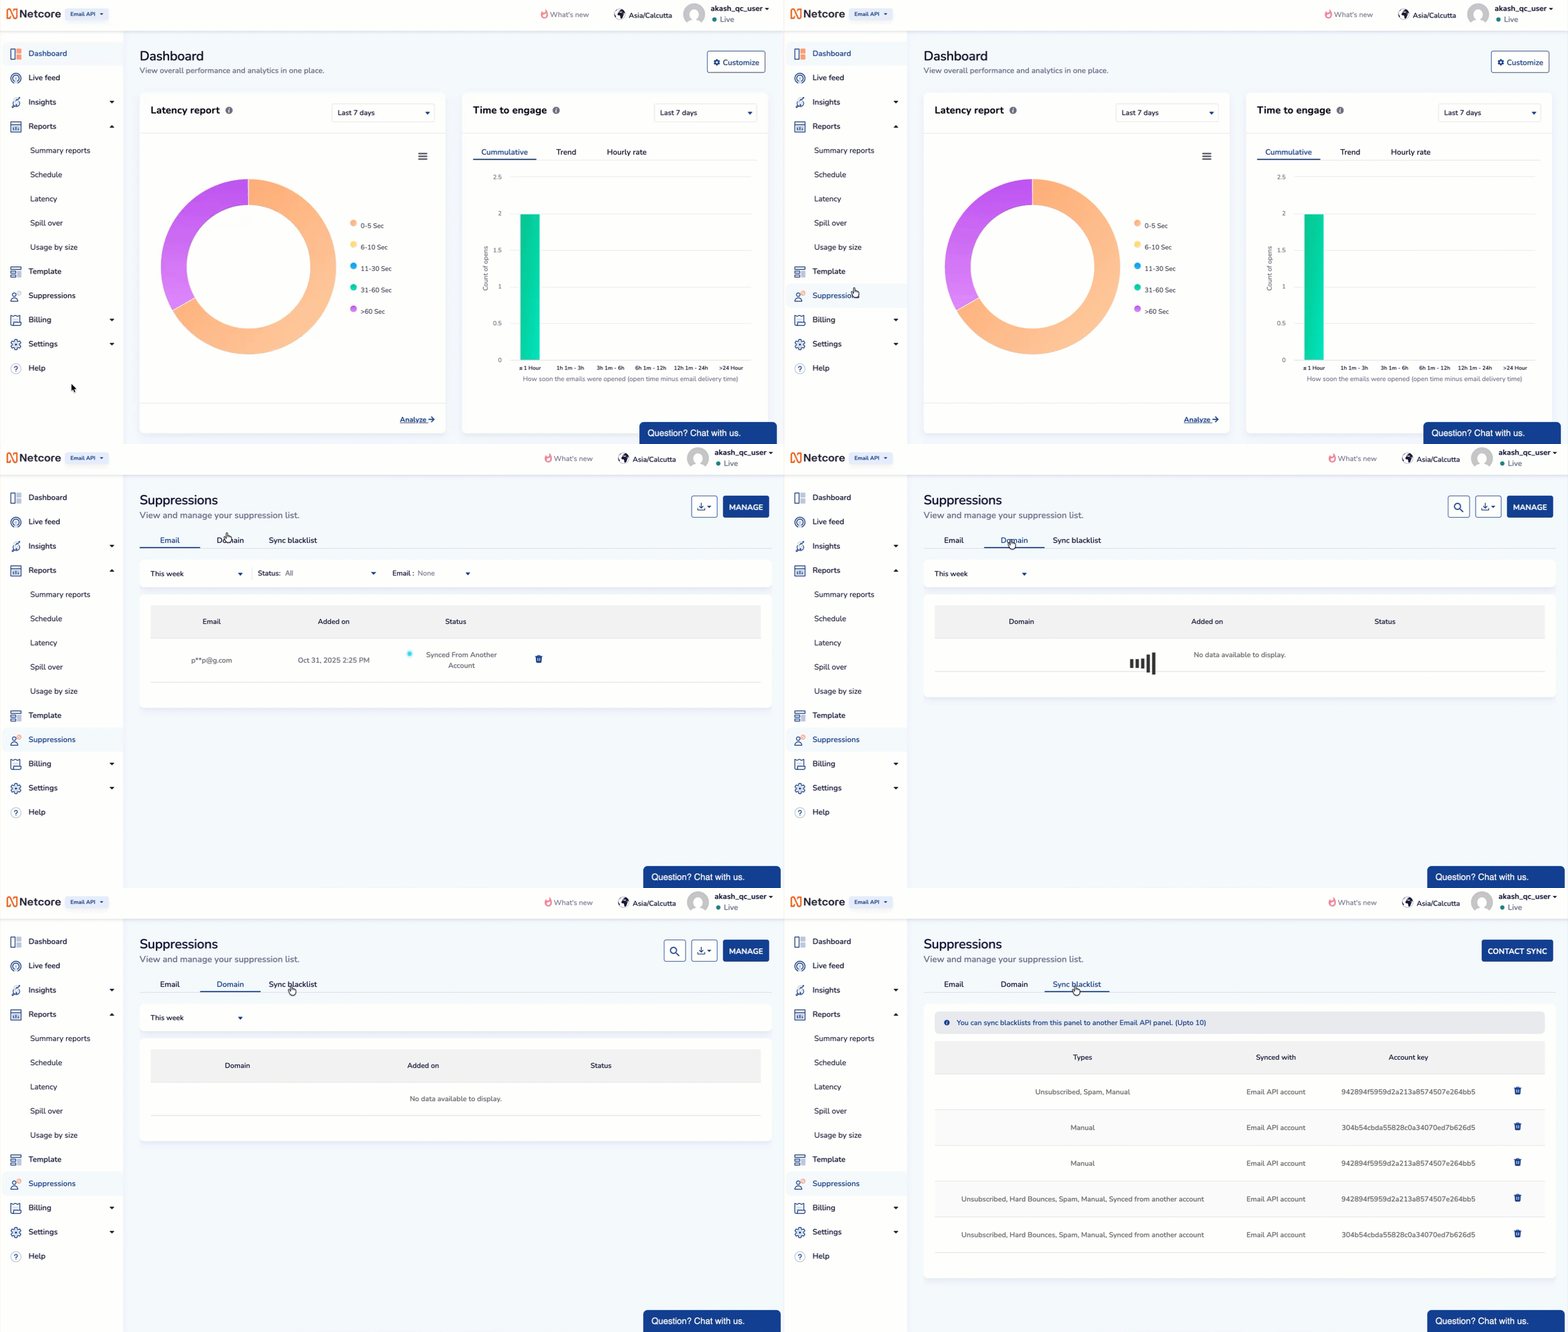
Suppressions allows you to view, manage, and sync your suppression list. This helps you avoid sending messages to contacts who should not receive them. Suppressions include unsubscribed contacts, hard bounces, spam complaints, and manually blacklisted contacts.

View and manage your suppression list.
The three sections present on this screen are:
Emails
The Email tab lists all suppressed email addresses, including those unsubscribed, marked as spam, hard-bounced, or manually added. Use this section to view, filter, and manage email-level suppressions to maintain compliance and protect deliverability.
Click MANAGE to add Email IDs or their CSV files to add or remove to Suppression list.
| Feature | Description |
|---|---|
| Displays all suppressed email addresses that match the selected filters. | |
| Added On | Shows when the email was added to the suppression list. |
| Status | Displays the suppression type. This includes: Unsubscribed, Bounce, Abuse, and Manual. |
| Manage | Allows bulk actions such as uploading, downloading, or removing suppressions. |
Use Case Examples:
- The marketing team ensures that unsubscribed users don’t receive campaigns.
- Automatically exclude hard-bounced emails to protect sender reputation.
- Check if a customer’s email was suppressed before troubleshooting delivery issues.
Domain
The Domain tab allows you to manage domain-level suppressions. When a domain is suppressed, no emails will be sent to any address under that domain, helping you prevent accidental sends to blocked or restricted domains.
You can also filter the emails by date range, or search by specific email address.
Click MANAGE to add Domains or their CSV files to add or remove to Suppression list.
When multiple brands or domains share the same master account, unsubscribe preferences apply across all of them. For example, if Acme Group owns FoodHub, QuickCart, and CityMart, and a user unsubscribes from FoodHub, they will automatically be unsubscribed from QuickCart and CityMart as well.
| Filed | Description |
|---|---|
| Domain | Displays all suppressed domains and their associated suppression details. |
| Added On | Shows the date when the domain was suppressed. |
| Status | Displays the suppression type (e.g., Manual, Synced). |
| Manage | Add or remove entire domains to/from the suppression list. |
Use Case Examples:
- Suppress entire domains of competitors, partners, or test accounts to avoid accidental campaigns.
- Block email delivery to specific country domains when required by legal teams.
- Instantly stop all emails going to a problematic domain such as high bounce rates.
Sync Blacklist
The Sync Blacklist tab lets you sync suppression lists across multiple email API accounts. This ensures consistent compliance and prevents duplicate management efforts by automatically sharing unsubscribes, bounces, and spam complaints across accounts.
| Feature | Description |
|---|---|
| Sync Capability | Allows you to sync blacklists across multiple email API panels (up to 10). |
| Types | Includes unsubscribed, hard bounces, spam, manual entries, and entries synced from another account. |
| Synced With | Displays which Email API account is being synced with this suppression list. |
| Account Key | Shows a unique identifier for the synced account. |
| Remove Sync | Option to stop syncing blacklist data from a particular account. |
Use Case Examples:
- Automatically sync unsubscribes across all business units sharing a master account.
- Ensure that suppression lists are consistent across marketing, transactional, and product email systems.
- Avoid manual duplication of blacklist management across multiple environments.
Contact Sync
The Contact Sync feature ensures that your campaign reports and analytics always reflect the most up-to-date contact data. Use this option whenever you:
- Update or import new contacts in your CRM or customer list.
- Want the latest audience data to appear in your live reports.
- Need to ensure delivery and engagement metrics reflect your current contact base.
- Click the Contact Sync button (🔄) to start syncing your contacts with the platform.
- Select the Type.
- Eneter the Email API Account key and click SAVE.
Updated 3 months ago
