
Template Management
Overview
Template Management empowers you to create, manage, and deploy RCS templates effortlessly, eliminating back and forth while creating templates and having complete visibility on their status.
Key Features
- Seamless Template Creation
Design simple text templates, captivating rich card standalone templates, and interactive rich card carousel templates. Craft visually appealing and engaging messages tailored to your specific communication needs. - Status Tracking
Monitor the status of your templates, distinguishing between approved and rejected templates.
Streamline the template approval process, ensuring compliance and consistency in your messaging. - Edit and Delete Templates
Edit existing RCS templates directly from the CPaaS dashboard. Changes made to the templates are immediately reflected upon saving. Delete existing RCS templates directly within the system. Once deleted, the templates are removed from the operator and are no longer available for use. Approved templates can only be deleted. Drafts and rejected templates can be edited and deleted.
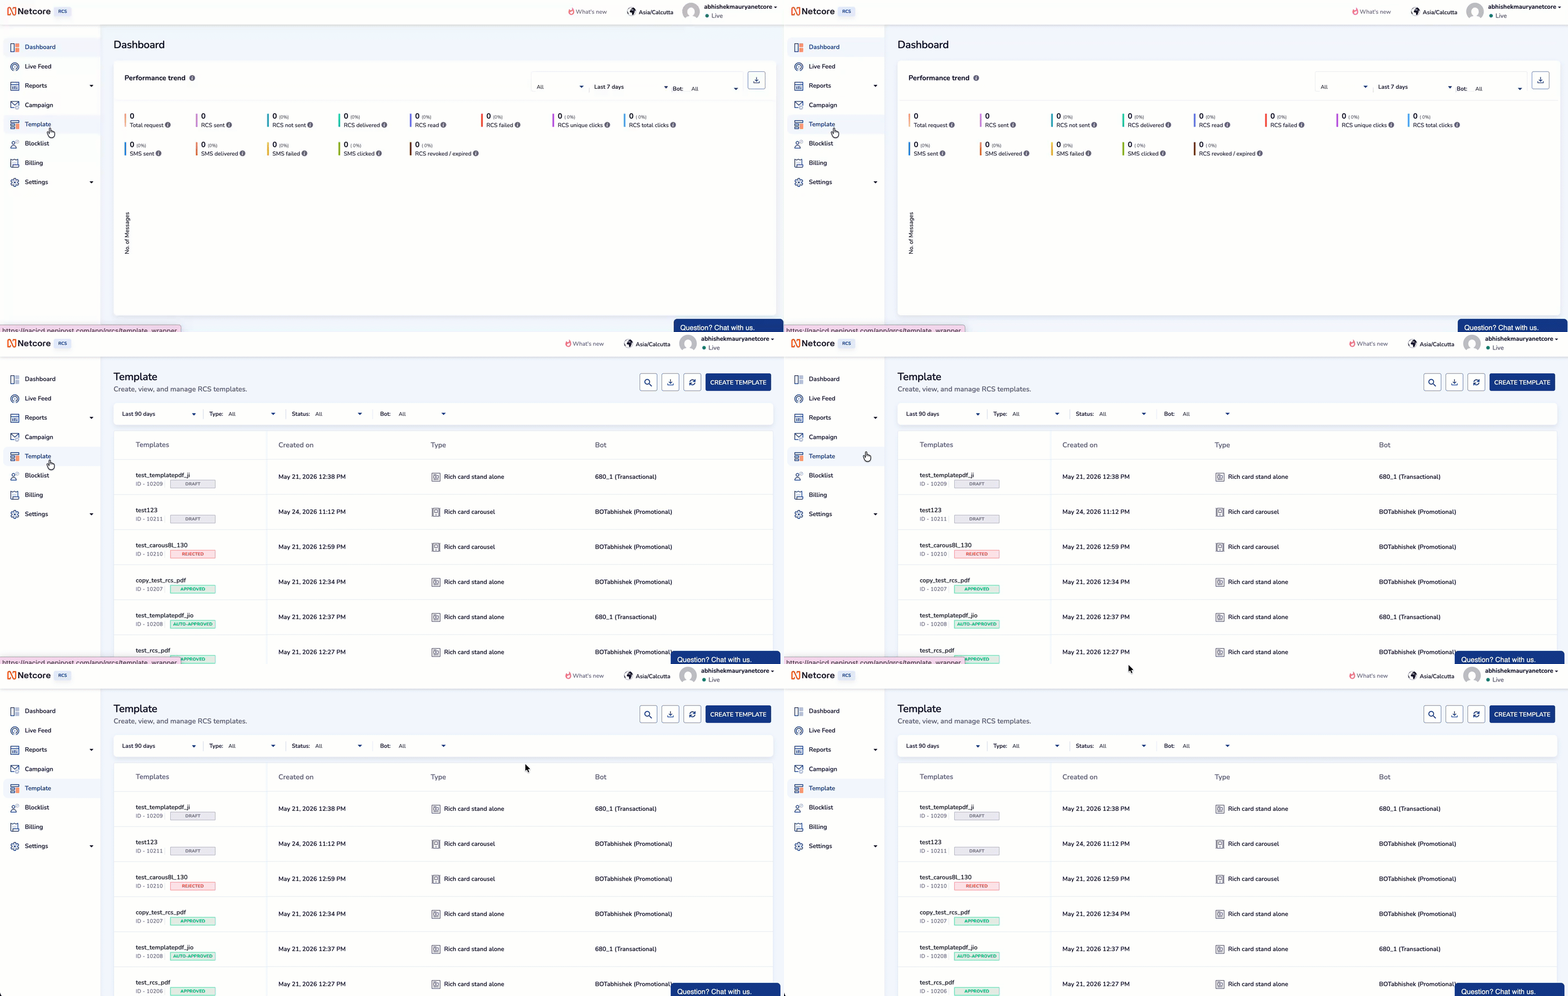
Navigate to Template
Manage Template
Create, search, filter, and manage your RCS templates from a centralized dashboard. Use filters to quickly find templates by type, status, date range, or bot, and create new templates for your campaigns.
| Field | Description |
|---|---|
| Date Filter | Filters templates based on the selected time range. Example: Last 90 days. |
| Type Filter | Filters templates by template type, such as Text message, Rich card standalone, or Rich card carousel. |
| Status Filter | Filters templates based on approval or usage status. Example: Approved, Auto Approved, Pending, Rejected, or Draft. |
| Template Name | Displays the name of the RCS template. |
| Template ID | Displays the unique identifier associated with the template. |
| Created on | Displays the date and time when the template was created. |
| Type | Displays the template type, such as Rich card standalone or Rich card carousel. |
| Edit | Opens the selected template in edit mode to modify its configuration or content. |
| Duplicate | Creates a copy of the selected template for faster template creation and reuse. |
| Delete | Permanently removes the selected template from the system. |
Other Functionality Available
Refer to the table below to understand the other functionalities available on the dashboard:
| Search | Search for templates using template name or other identifiers. |
|---|---|
| Download | Download or export the template list for reporting or offline reference. |
| Refresh | Refreshes the template list and fetches the latest template statuses and updates. |
| Create Template | Opens the template creation workflow to configure a new RCS template. |
| Template Management | Use filters and actions to quickly locate, review, and manage existing RCS templates. |
Steps to Create RCS Template
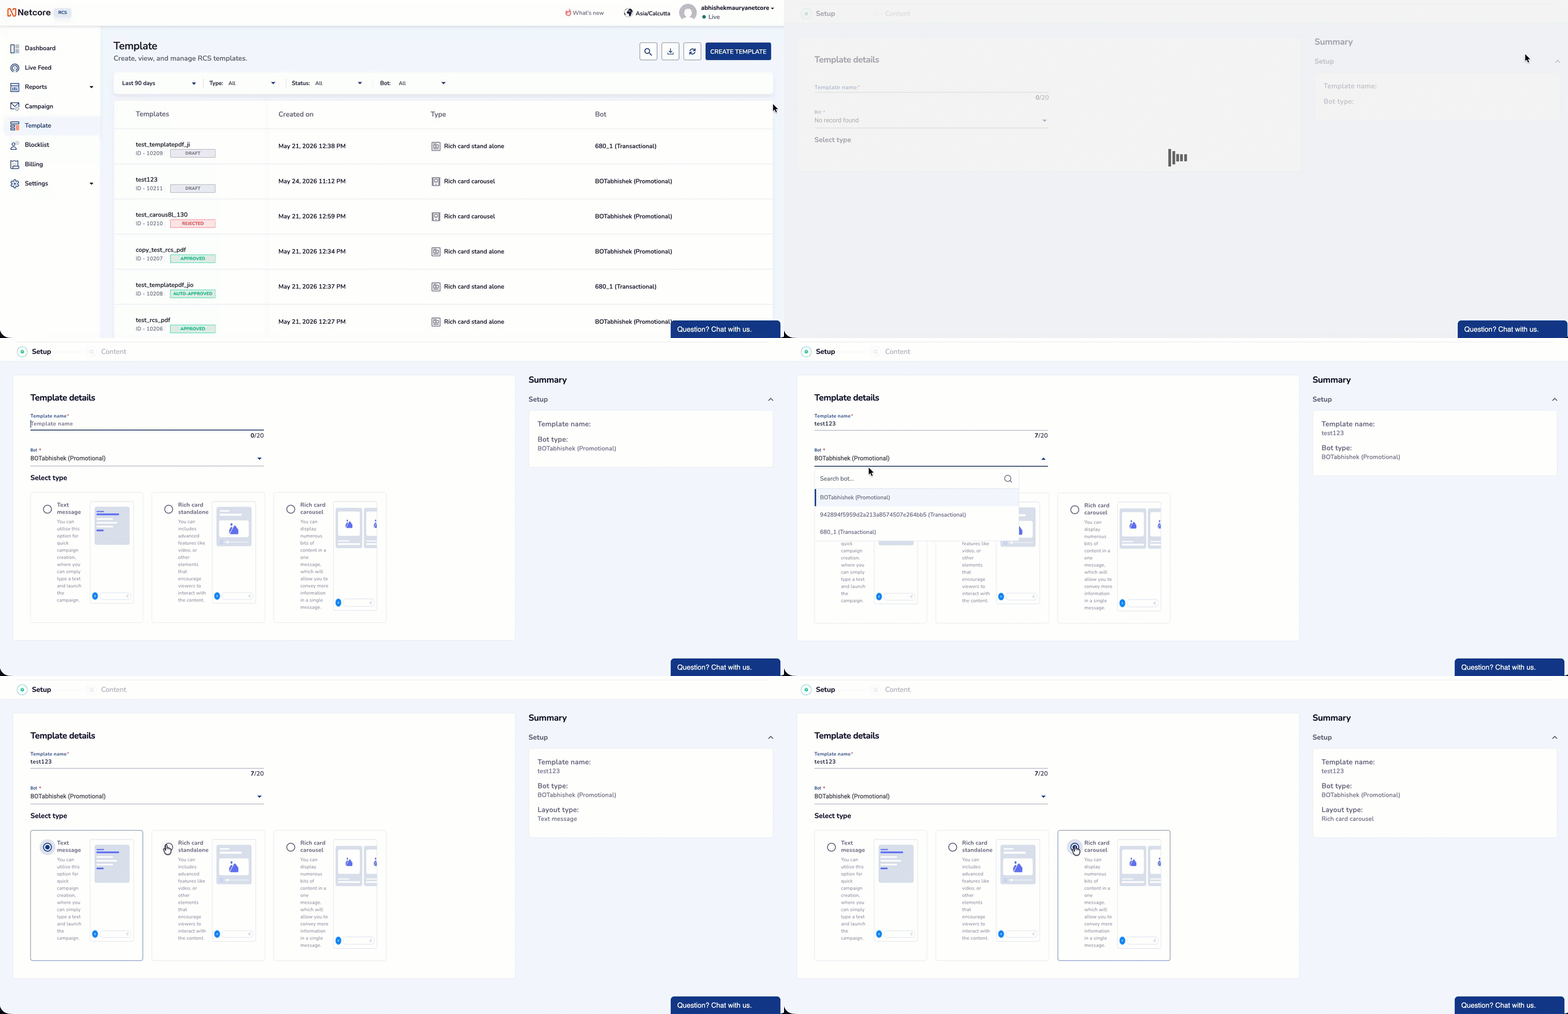
Create Template
- Log in to the CPaaS account, navigate to the Template section, and click CREATE TEMPLATE.
- On the Setup page, enter the below details:
| Field Name | Description |
|---|---|
| Template Name | The name of the template you want to create |
| Bot Selection | Select single or multiple bots as applicable for you panel. |
| Template Type | Select from the option below:
|
Once the template type is selected, configure the content section accordingly. Refer below to understand the different options available for the three template types:
Multibot Selection
Using multibot selection, submit the same template to several bots in a single step instead of recreating it for each one. This is useful when the template is complex, such as a carousel or rich card with multiple images and buttons, where rebuilding it for every bot would mean repeating the entire content setup.
Submit Template to Multibot
- Open the RCS template creation form and enter the template Name.
- In the Bot field, select every bot you want to submit this template to.
- Build the template content (text, media, carousel, rich card, buttons, header, and footer).
- Click Send for Approval, review the confirmation, and confirm.
Approval Process
When you submit, a progress view opens immediately with one card for each selected bot. Each card resolves on its own as the approval request for that bot completes:
- Submitted for approval confirms the template was accepted by that bot and sent for review.
- Error shows the reason the submission failed for that bot, for example a name conflict.
Text
| Field | Description |
|---|---|
| Body | Enter the text content for the RCS message. This supports plain text, emojis, and personalisation variables. Maximum allowed limit is 2500 characters. |
| Add Variable | Inserts personalisation placeholders in the message body in the format [custom_param]. Values are dynamically replaced during campaign execution. |
| Button Toggle | Enable this option to add interactive buttons to the RCS message. |
| Add Button | Adds a new button to the template. Multiple buttons can be configured based on supported limits. |
| Type of action | Select the button action type. Example: Reply, Open URL, or Dialer. |
| Reply | Allows users to send a predefined response when the button is clicked. |
| Button text | Defines the label displayed on the button. Maximum limit: 25 characters. Supports variables. |
| Button pushback | Defines the payload or identifier sent when the button is clicked. Used for tracking responses or triggering workflows. Maximum limit: 120 characters. |
Rich Card Standalone
Displays a single rich media card with content, media, and optional action buttons within one RCS message. Refer to the table below to understand the configuration available when the template type is Rich Card Standalone:
| Field | Description |
|---|---|
| Card orientation | Select the layout orientation for the rich card between Vertical or Horizontal layout. |
| Card alignment | Select the card size or alignment type.
|
| Type | Select the media type to include in the card. Supported types may include Image or Video or PDF. |
| Upload media | Choose how the media file will be added to the template.
|
| Title | Enter the primary heading displayed on the rich card. Supports emojis and personalisation variables. Maximum limit: 200 characters. |
| Description | Enter the supporting message content displayed below the title. Supports emojis and personalization variables. Maximum limit: 2000 characters. |
| Add Variable | Inserts personalization placeholders in the format [custom_param]. Variables are dynamically replaced during campaign execution. |
| Button Toggle | Enable this option to add interactive buttons to the rich card. |
| Add Button | Adds one or more action buttons to the rich card template. |
| Type of action | Select the action performed when users click the button. Supported actions may include Reply, Open URL, or Dialer. |
| Button text | Defines the label displayed on the button. |
| Button postback / URL | Defines the payload, URL, or action value triggered when the button is clicked. |
| Standalone Rich Card | Displays a single rich media card with content, media, and optional action buttons within one RCS message. |
Rich Card Carousel
Rich card carousel templates allow multiple cards to be displayed within a single horizontally scrollable RCS message. Refer to the table below to understand the configuration available when the template type is Rich Card Carousel:
| Field / Option | Description |
|---|---|
| Card Tabs | Each tab represents an individual card within the carousel. Use tabs such as Card 1 to configure card-specific content. Click Add to include additional cards in the carousel. |
| Card Width | Select the width of all carousel cards. Example: Short or Medium. The selected width applies to all cards in the carousel. |
| Card Height | Select the height of all carousel cards. Example: Short, Medium, or supported sizes based on RCS specifications. |
| Fixed Dimensions Note | All cards in the carousel use the same dimensions and cannot be customized individually. |
| Type | Select the media type to display in the carousel card. Supported types may include Image or Video. |
| Upload media | Choose how the media file will be added to the template.
|
| Title | Enter the card title displayed within the carousel card. Supports emojis and personalization variables. Maximum limit: 200 characters. |
| Description | Enter supporting text displayed below the title. Supports emojis and personalization variables. Maximum limit: 2000 characters. |
| Add Variable | Inserts personalization placeholders in the format [custom_param]. Variables are dynamically replaced during campaign execution. |
| Button Toggle | Enable this option to add interactive buttons to carousel cards. |
| Add Button | Adds one or more action buttons to the selected carousel card. |
| Type of action | Select the action triggered when users click the button. Supported actions may include Reply, Open URL, or Dialer. |
| Button text | Defines the label displayed on the button. |
| Button postback / URL | Defines the payload, URL, or action value triggered on button click. |
| Device Preview | Displays a real-time preview of how the carousel message appears on a mobile device. |
- SAVE AS DRAFT saves the template in draft mode without sending it for approval. Use this option when the template configuration is incomplete or requires further edits before submission or,
- SAVE & SEND FOR APPROVAL to send the template for Meta's approval. Once approved, the template becomes available for use in RCS campaigns.
Edit a Template
The steps for editing an RCS template vary depending on the vendor selected.
- If it is a VI vendor, the Meta-approved templates cannot be edited.
- Otherwise, in the case of a Jio vendor, all the templates can be edited irrespective of their state: Approved, Draft, Rejected.
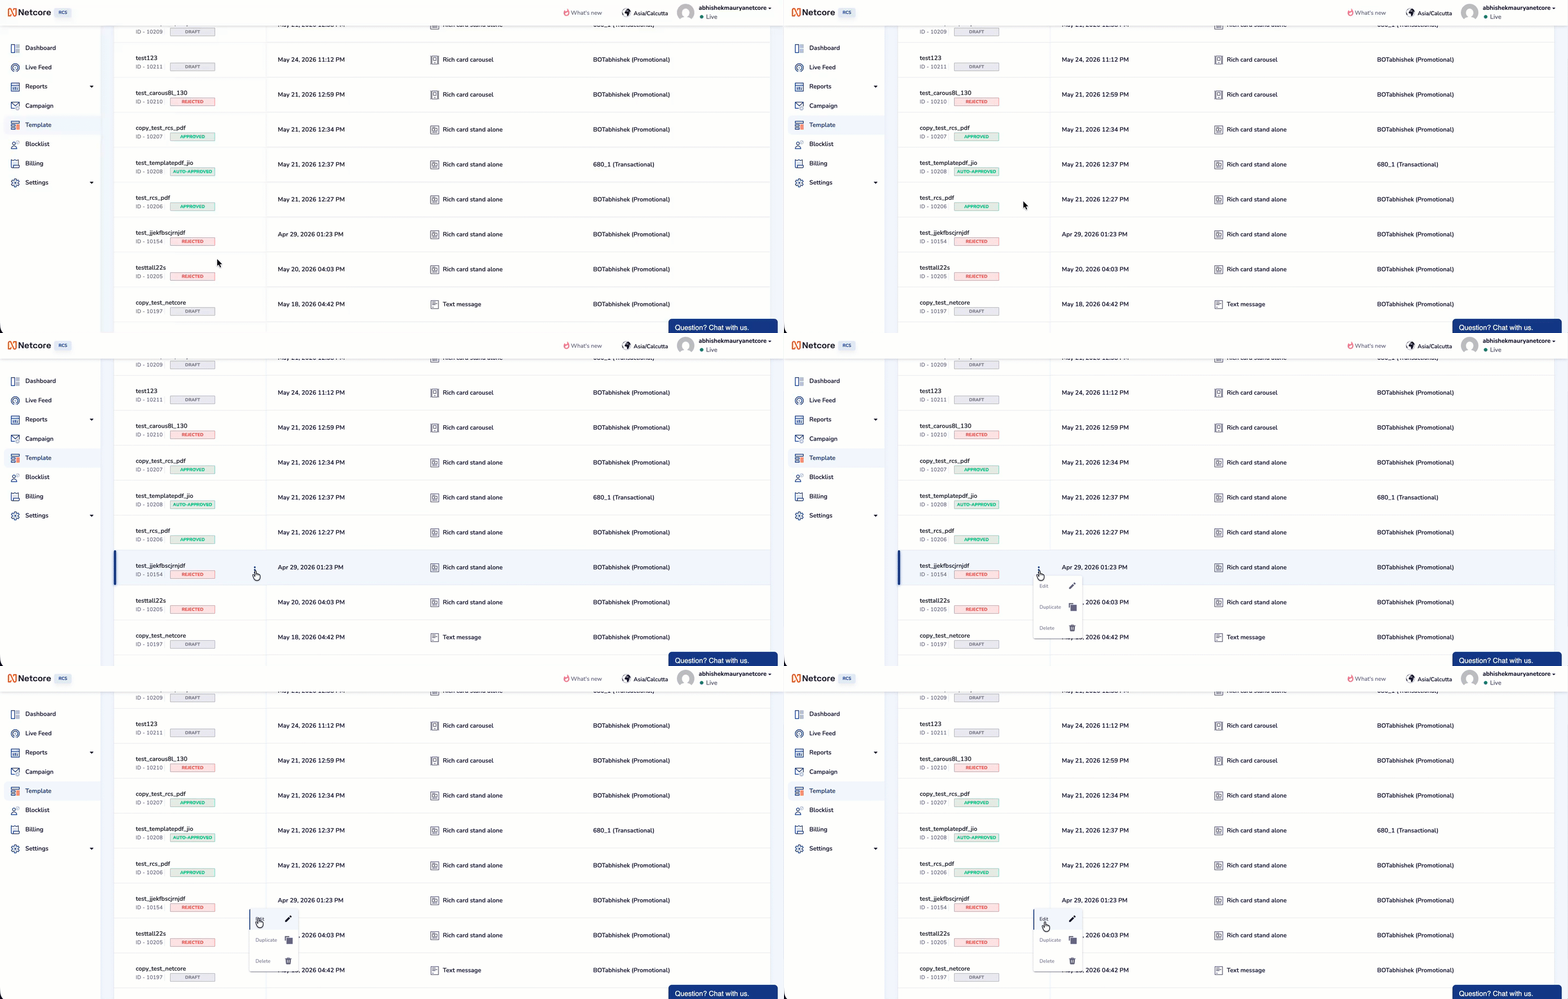
Edit a Template
However, in the case of Approved or Rejected , only the template's content can be edited, not the Template Name or Bot.
Vendor Approval State
- In case on Vi, the template created will first go to Vi for Approval.
- There is no Approval flow in case of Jio. The Meta-approved templates cannot be edited if it is a VI vendor
Updated 3 days ago